Appearance
Text
The Text component contains the default text strings that you can fill in with the required information and format using the WYSIWYG editor.
To customize the text component:
Drag
Textto the layout.Go to the
Propertiestab on the tools panel.Click the text field to open the WYSIWYG editor.
Enter the required text and set its properties.
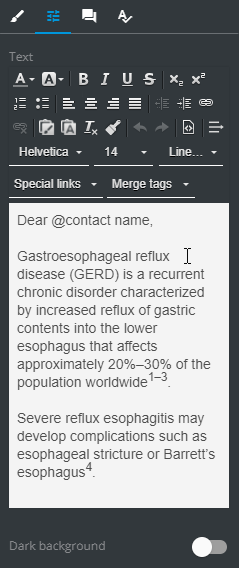
To view the text in the dark mode, turn on the Dark background toggle.
WYSIWYG
You can customize the text properties with the following WYSIWYG options:
| Control | Action | Control | Action |
|---|---|---|---|
| Change the text color | Add the link to the text | ||
| Change the text background | Remove the link in the text | ||
| Bold the text | Paste the copied text, keeping the source formatting | ||
| Italicize the text | Paste the copied text plain | ||
| Underline the text | Remove formatting for the selected text | ||
| Strikethrough the text | Copy formatting of the selected text | ||
| Subscript the text | Undo the last operation | ||
| Superscript the text | Redo the undone operation | ||
| Make the list numbered | Access text HTML source | ||
| Make the list bullet | Preserve the selected text from wrapping across the lines in the email client | ||
| Align text left | Set the text font | ||
| Center the text | Set the text font size | ||
| Align text right | Set the line height for the text | ||
| Justify the text | Set the link to the remote call for the selected text | ||
| Decrease the text left indent | Add merge tags | ||
| Increase the text left indent | Set the text preview background dark |
Keyboard shortcuts
Alternatively, you can use the keyboard shortcuts to do the following:
Delete the text—Ctrl+X
Copy the text—Ctrl+C
Paste the formatted text—Ctrl+V
Paste the plain text—Ctrl+Shift+V
Copy format—Ctrl+Shift+C
Anchors and hyperlinks
You can add to your email. For this, create a and link it with the .
First, create a destination anchor.
Select the required text fragment on the layout.
Go to the
Propertiestab.Click
 to open the
 Sourcepop-up.Wrap the destination text component in the
<span>tag and assign anidto it.
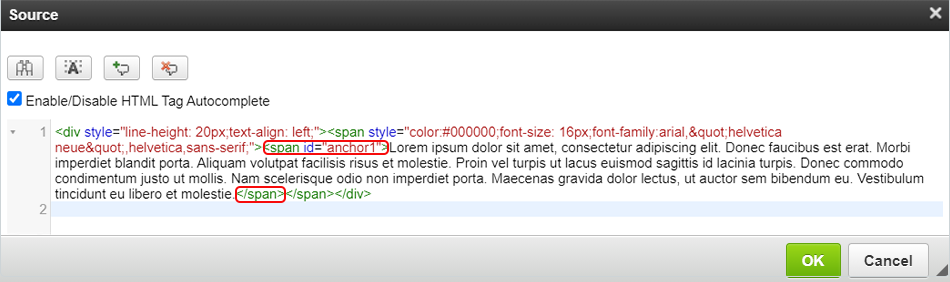
- Click
OKto apply the changes.
Then create a source anchor.
Select the required text fragment on the layout.
Go to the
Propertiestab and click.In the
Sourcepop-up, wrap the anchor text in the<a>tag.Add the
idof the destination anchor to thehrefattribute starting with#.
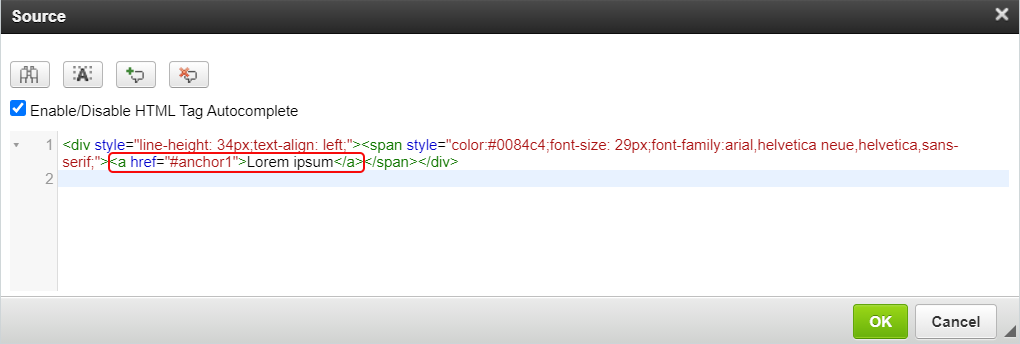
- Click
OKto apply the changes.
Check your hyperlink in the VIEW mode.
Links
eWizard Editor allows you to set a text fragment as a link leading to an external resource or service. You can use and customize several link types.
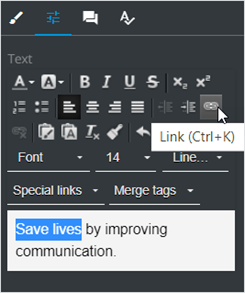
To insert a link in the text fragment:
Select the required text on the
Propertiestab.Click
Link.
- In the
Linkpop-up that appears, select the link type.
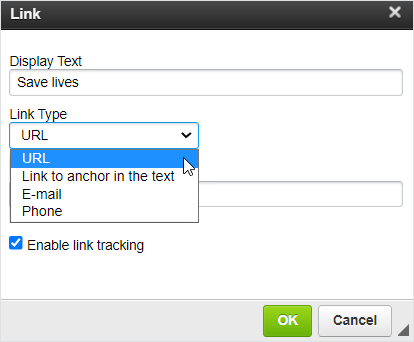
- Fill in the fields depending on the link type selected.
You can set the following link types:
| Link type | Action | Configuration |
|---|---|---|
| URL | Redirects to an external resource | Select the protocol and enter the web address |
| Link to anchor in the text | Redirects to the particular part of your email | Preset the anchor before using this link type |
| Opens an outgoing email ready to be sent | Enter the subject, body, and/or the email address | |
| Phone | Starts a phone call | Click Phone number and specify the target phone number in the field that appears |
Select the Enable link tracking checkbox to track the link activity in your CRM system.
- Click
OKto apply the settings.
On the layout, the text fragment set as a link is highlighted. You can check the link in the VIEW mode.
Merge tags
A merge tag is a special code that allows you to insert unique user data into the outgoing email, thus making your mailing campaigns more personalized and efficient.
The list of merge tags available in eWizard Editor is determined by the target system selected on the email creation step. To expand the list of merge tags, please contact your administrator.
Merge tags dependencies
The available set of merge tags depends on the following prerequisites:
Configuration made by the administrator
Contact your administrator to receive the up-to-date list of merge tags required for your email service.
Target system
Merge tags ensure the correct behavior of the email in the target system you specify when creating the email. The choice of the target system indicates the set of merge tags in your future email.
Applying merge tags
To add a merge tag to the text component:
Select the text component on the layout.
Go to the
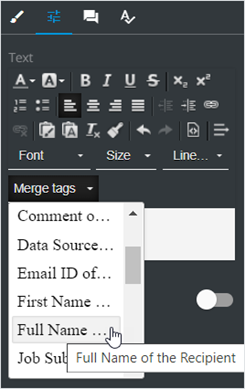
Propertiestab on the tools panel.Click the text field to open the WYSIWYG editor and select the text fragment.
Select the required merge tag from the list or enter it manually.
You can edit the inserted merge tag with the WYSIWYG editor. Follow the correct syntax of the target system for proper operation.
- Save changes.
After you publish the email to the target system, recipients get the email with the personalized data instead of the merge tag used. For example, the Full Name of the Recipient merge tag is automatically replaced by the full name of each recipient in the received email.
Make sure you select the same target system for the email publication as assigned on the email creation step.