Appearance
Monitoring
How to set up monitoring in eWizard (KPI)
Unlike regular presentations, e-Detailers allow the monitoring to gather the KPI.
By default, an e-Detailer provides common KPI: time on a slide, demonstration start and end time, etc.
If you need to analyze any other characteristics, for example patients' age, number, medicine dozing, or how many patients read their prescriptions, you can do via eWizard with slide components.
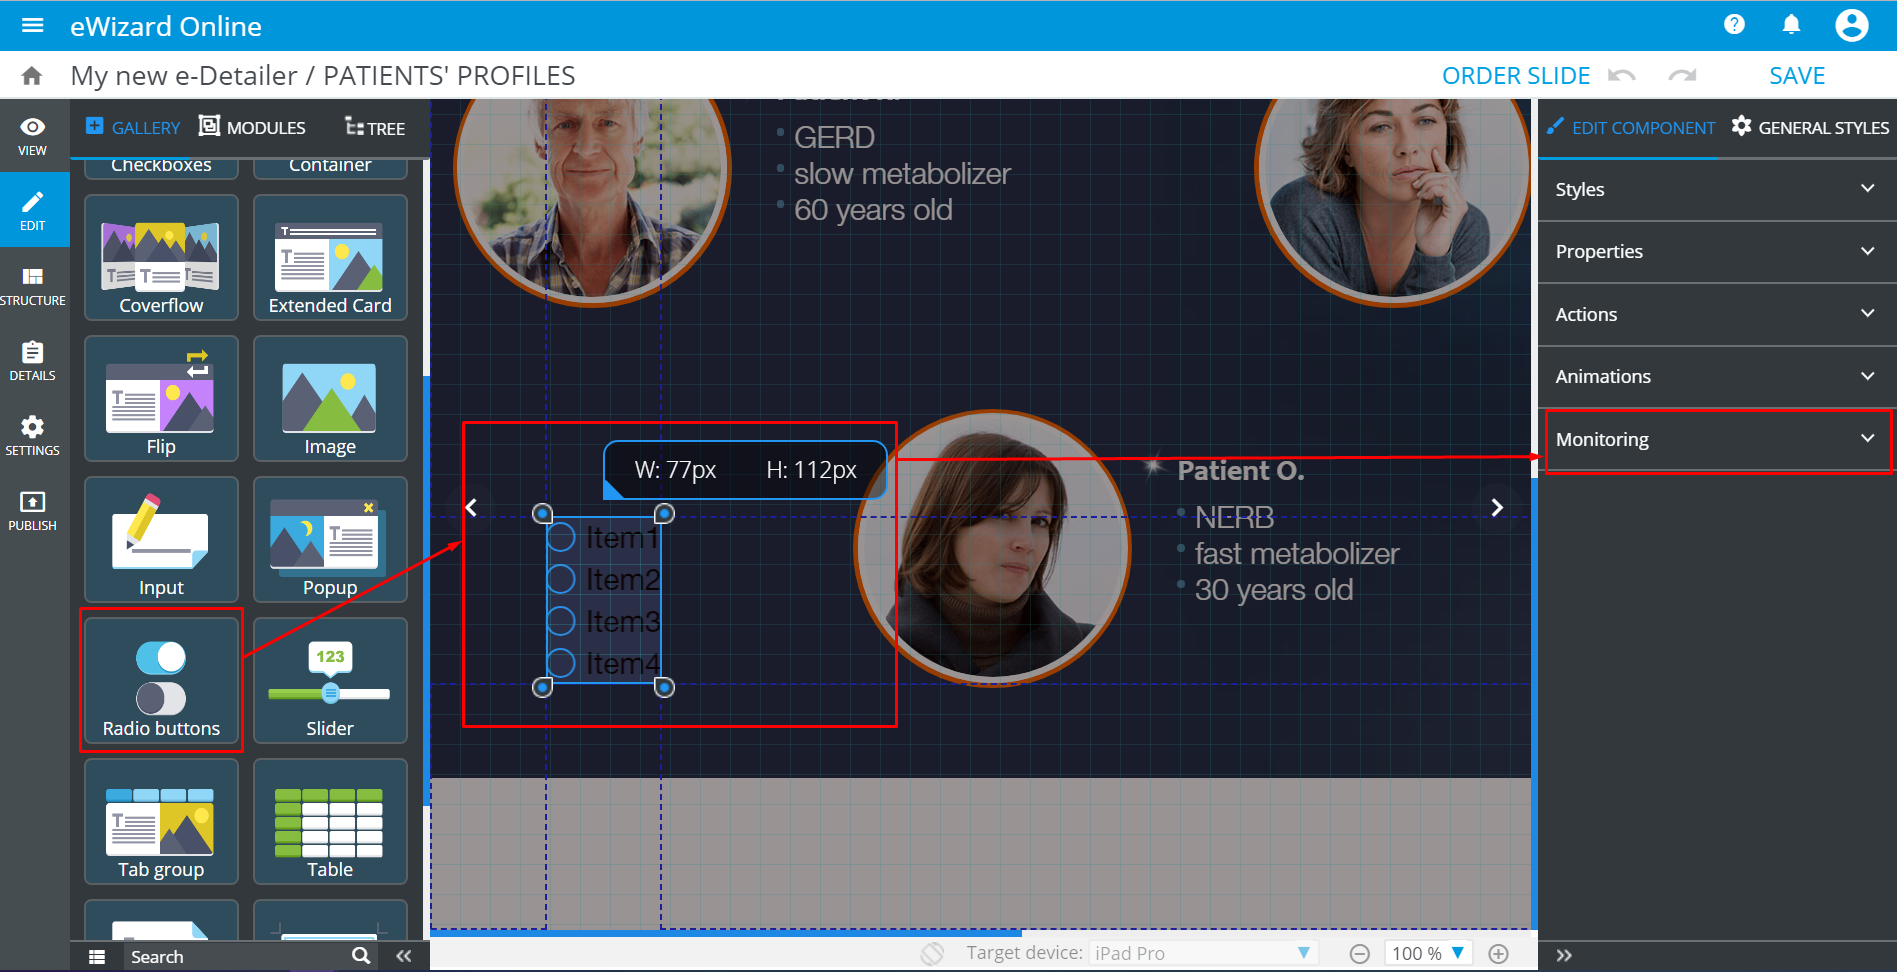
Components with KPI customization support are the following: Checkboxes, Input, Radio buttons, Slider, Textarea, Pop-up, and Video:
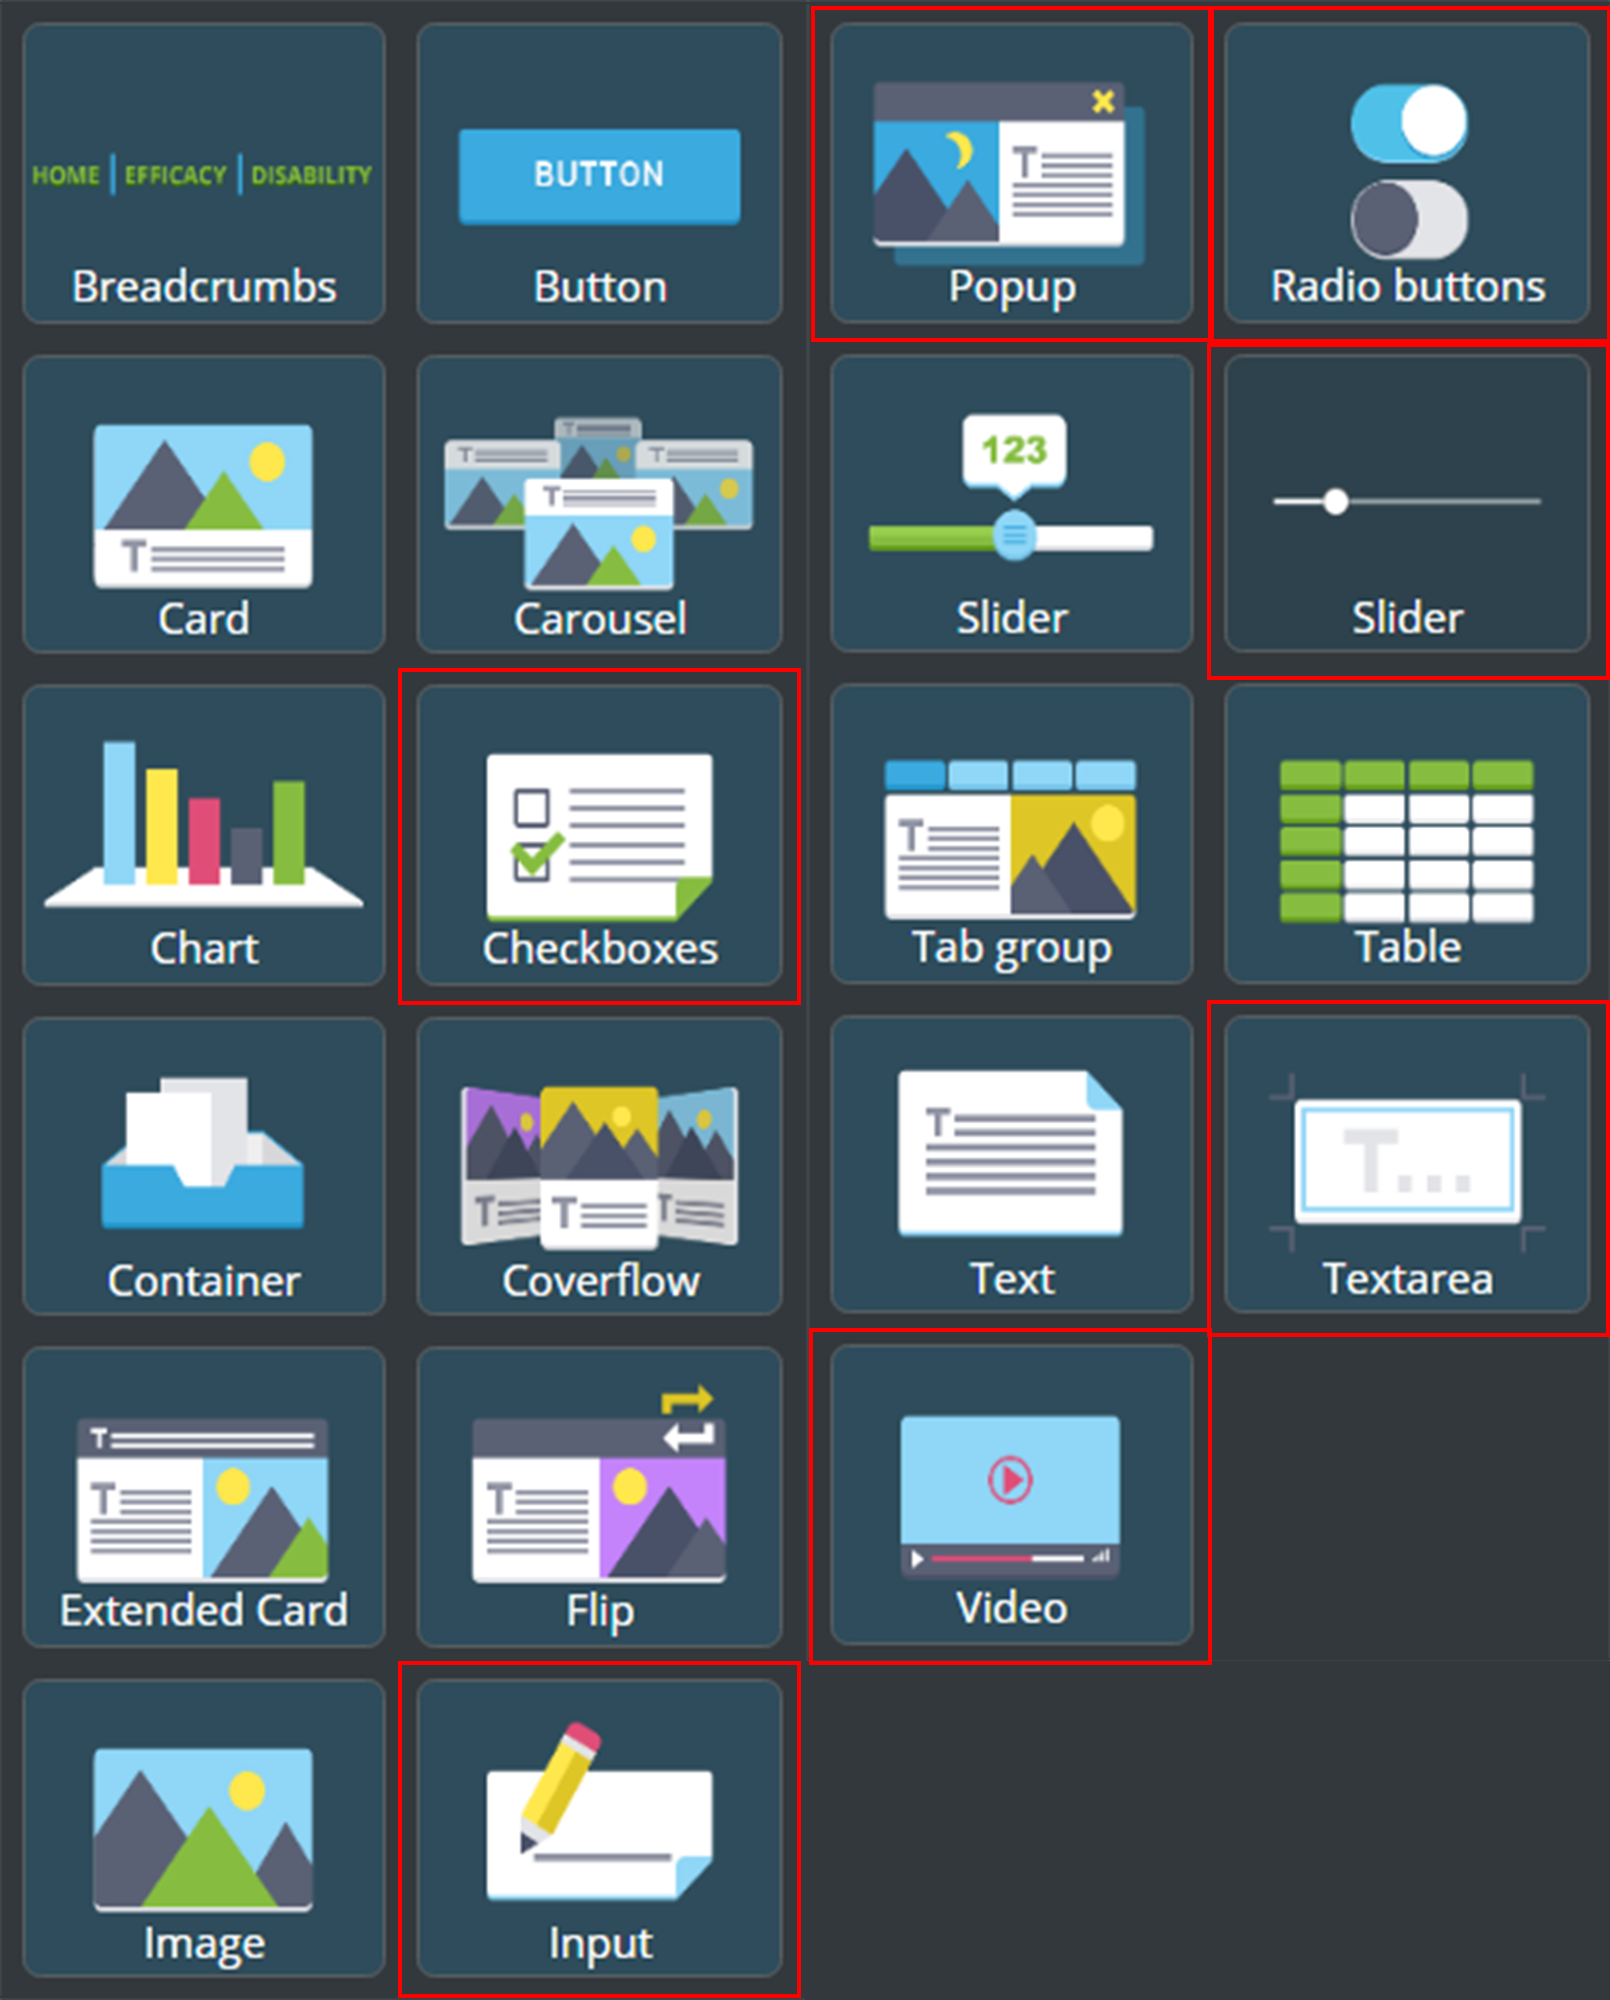
Each of these components comes in handy for the certain values: text, number, and boolean.
You can add a component to a slide and enable its monitoring without customization. The statistics are gathered as per the predefined schemes.
The configurable properties
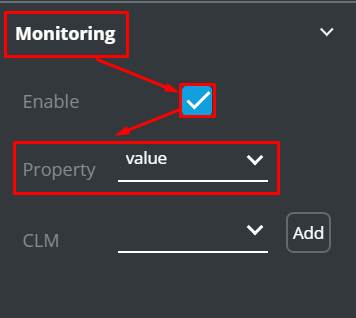
Find the configurable properties under Monitoring with Enable selected:
Not every component's property is available for the KPI collection. The available properties of each component are described below.
| Component | Property | KPI |
|---|---|---|
Input | Value | Records the input's value to KPI |
Textarea | Value | Records the textarea's value to KPI |
Slider | Name / Value | Records the label to KPI / Records the slider's value to KPI |
Checkbox | Indexes / Values | Records the checked element's index to KPI/ Records the checked element's value to KPI |
Radio buttons | Index / Selected | Records the selected element's index to KPI / Records the selected element's value to KPI |
Pop-up | Was-opened | Records the fact of pop-up opening to KPI |
Video | Playing Duration | Records the time of video playback to KPI |
5 steps to set up monitoring
Add a component for the monitoring purposes.
Enable monitoring.
Pick the property to be recorded to KPI.
Select CLM scheme to specify the monitoring pattern.
Set up the KPI scheme in any of two ways:
EITHER: select the preset KPI scheme
OR: configure your individual scheme
The algorithm of the KPI monitoring setting up is as follows:
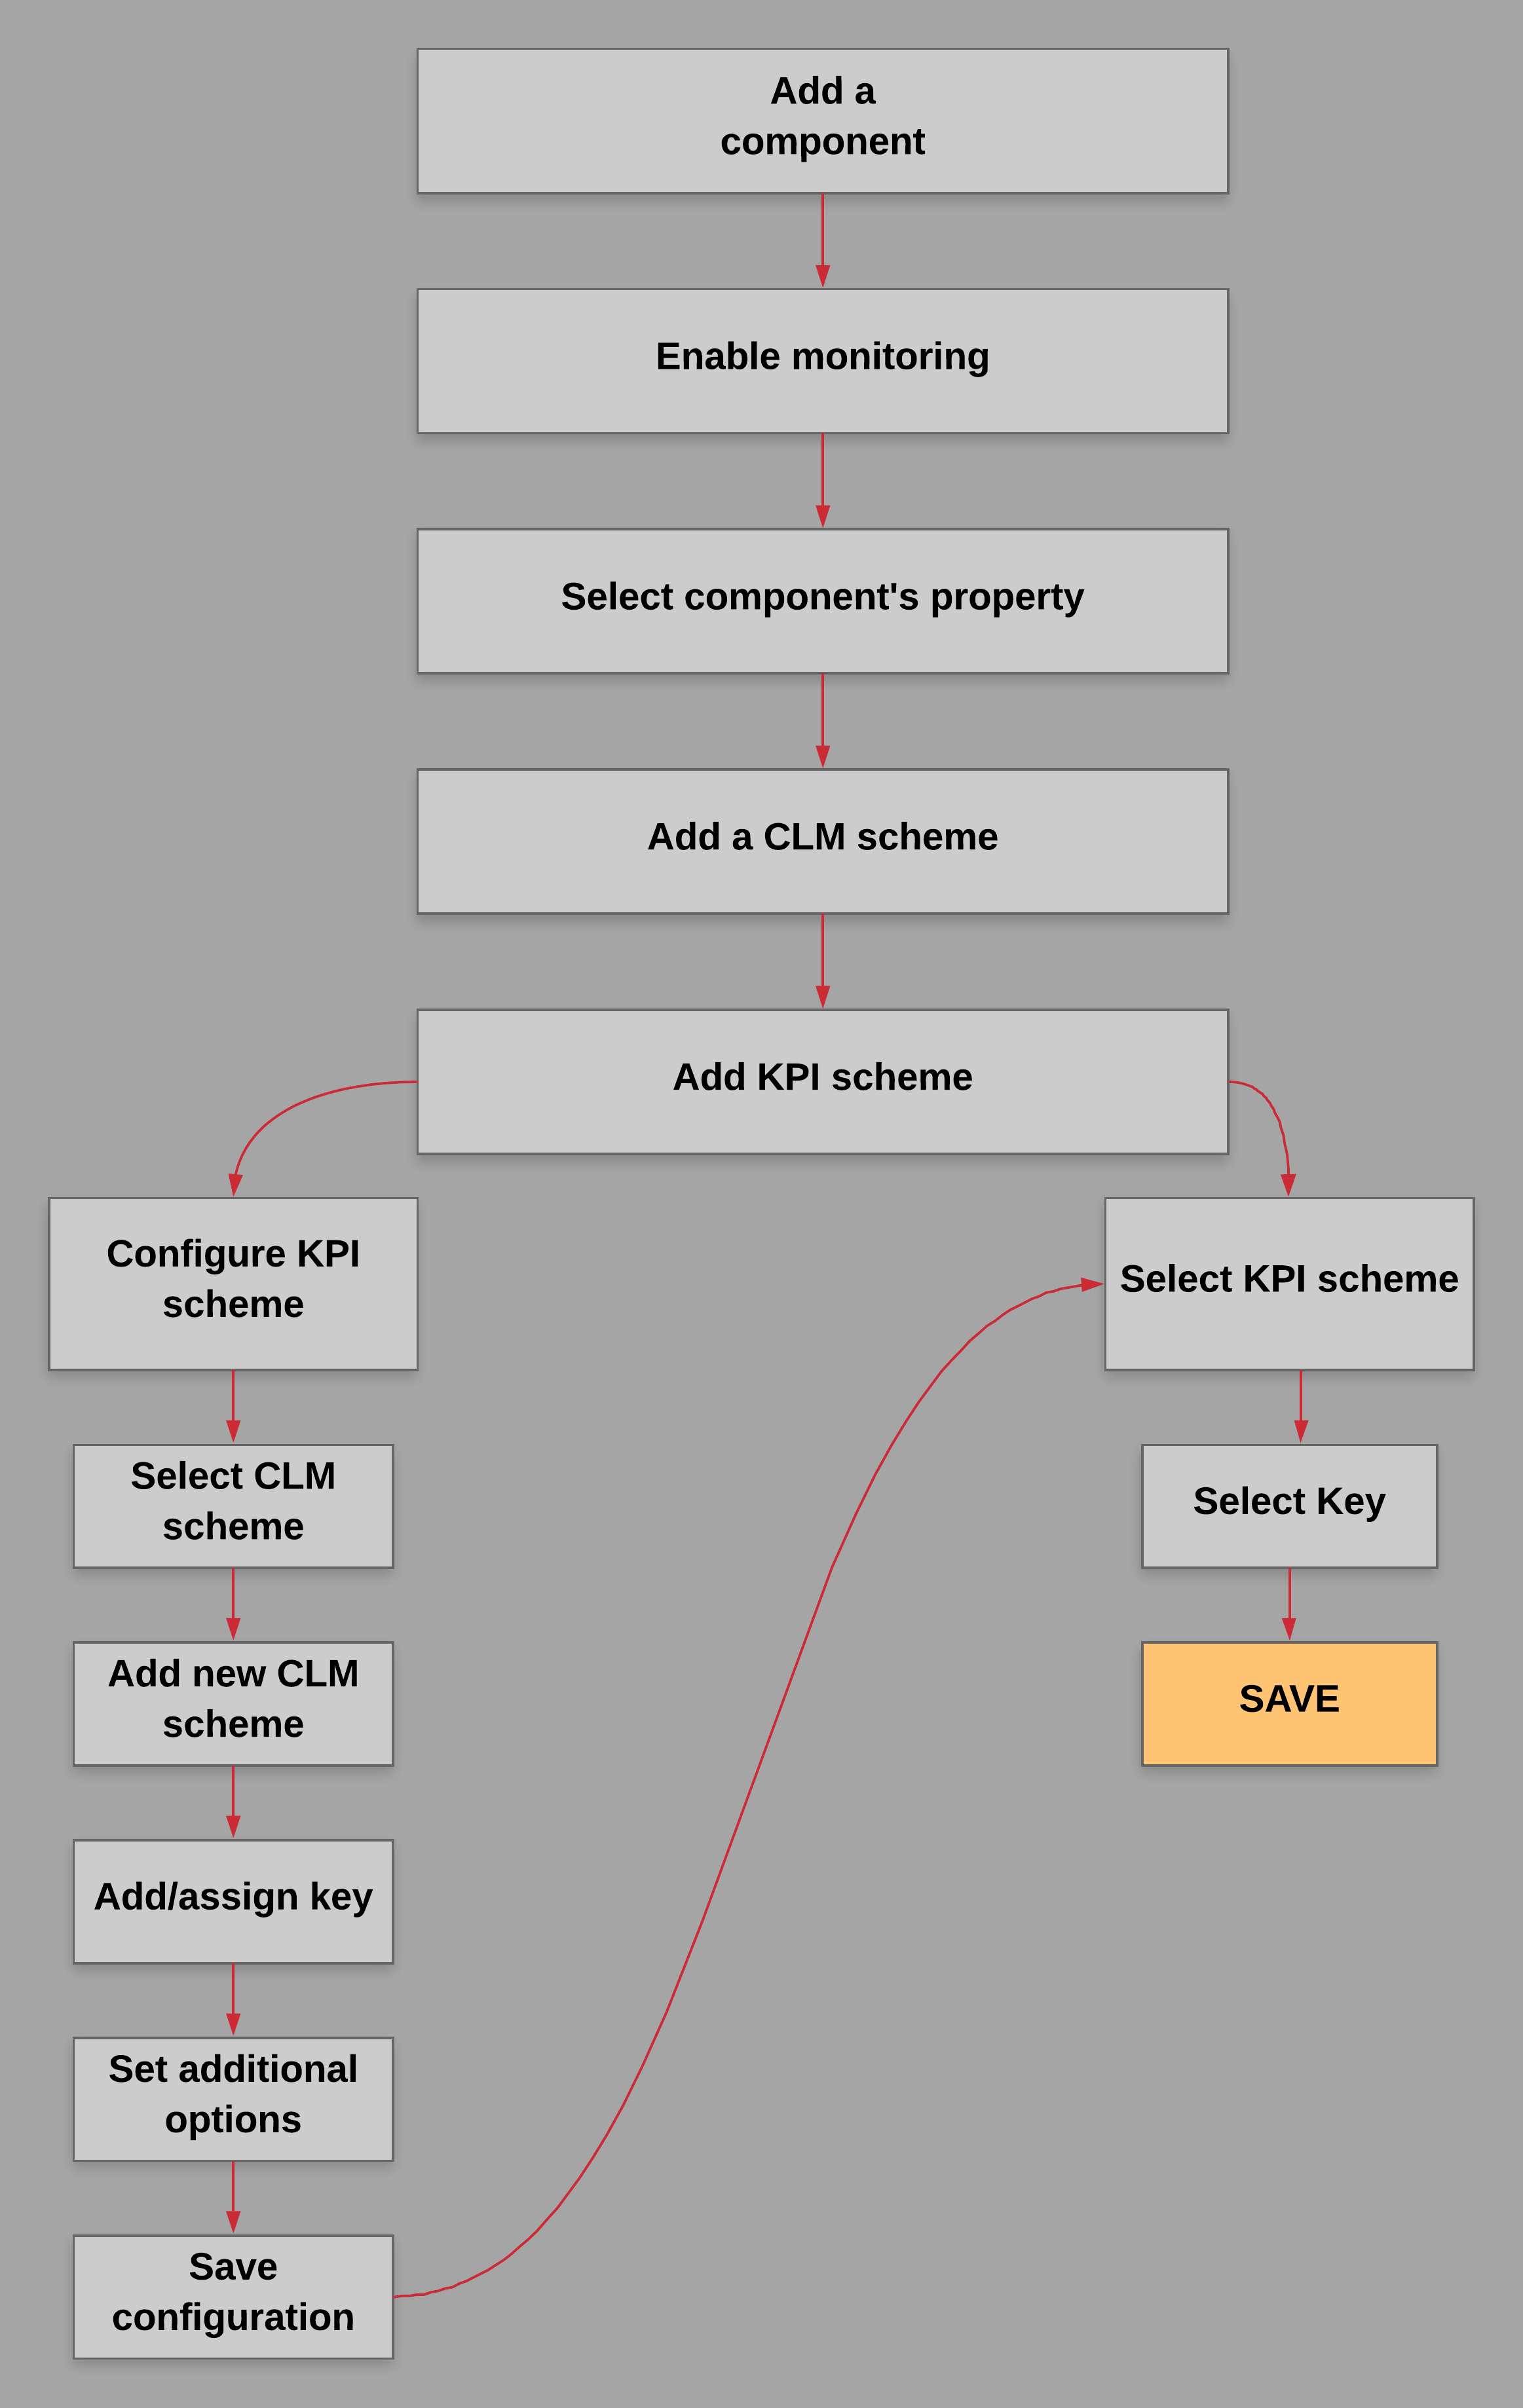
The above mentioned steps are detailed in the below sub-sections of this documentation.
How to enable monitoring
- Open an e-Detailer in the edit mode.
Place a component to a slide.
Go to
Monitoring.
Unfold
Monitoring.Check the
Enablebox.

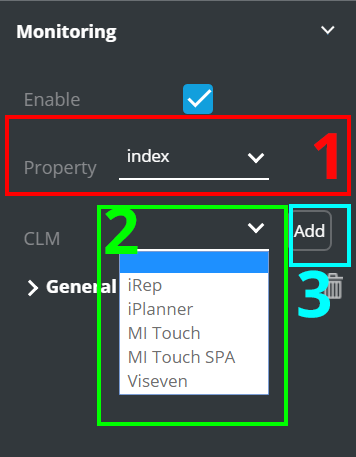
Property and the CLM scheme selection
Select
Property[1] (to specify what data to collect).Unfold the
CLMs list[2] and pick the CLM scheme.Click
Add[3].
The pre-set KPI scheme setting up
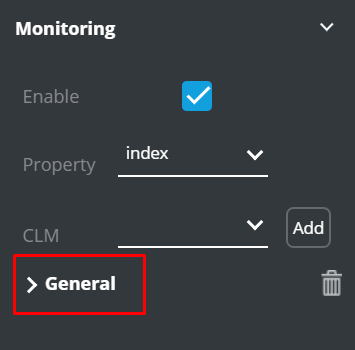
To specify the selected CLM's KPI scheme:
- Add a
CLM scheme:
- After adding a scheme, its name appears below the CLMs list.
- Click it to open the KPI scheme related to the selected CLM scheme.
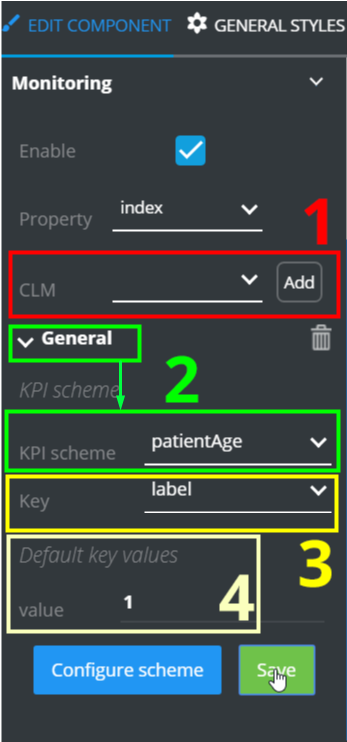
- Select the required
KPI scheme[1]:
- Pick the
Keyto define a KPI to be monitored while interacting with the component (when you will be demonstrating this e-Detailer during a call). TheDefault key values[2] stand for the rest of the properties added to the selected KPI scheme (consider one of the KPI scheme's properties you have already picked for monitoring).
- Click
Save[3].

If you enter any symbols in Default Key values, they will be transferred to your call's report as they are. You can leave this field empty as well. If you don't see any default key values here, it means the KPI scheme includes only one property which is already picked.
As an example, let's add the General scheme and pick the patientAge KPI scheme as a part of the selected CLM scheme:
Unfold
CLM.Select
General.Click
Add[1].Its settings appear below. Unfold them, click KPI scheme, and pick patientAge [2].
To choose a value for monitoring and record:
Unfold
Key.Select
label[3].
So, the label property of the patientsAge KPI scheme will be monitored when a doctor will have selected one of the radiobuttons on this slide during the call (in our example we are setting up monitoring for the Radiobuttons slide's component). Optionally, you can enter the other key's default value (it is the value key in our example) [4].
How to configure an individual scheme
In case the required KPI scheme is not pre-set (when you cannot find it in the KPI scheme dropdown), you can configure your specific KPI scheme. To configure a KPI scheme:
- Click
Configure scheme
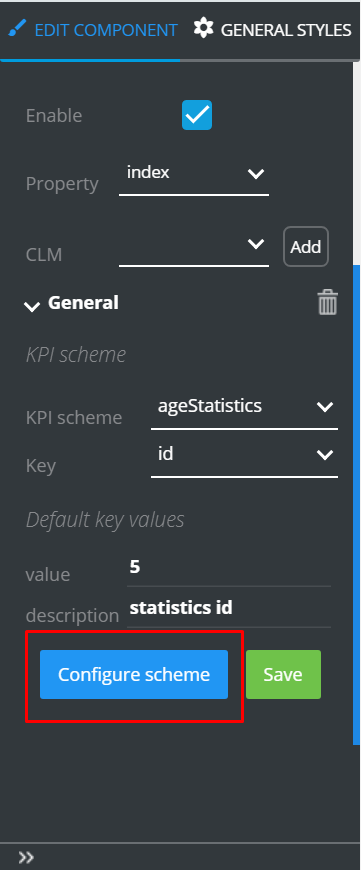
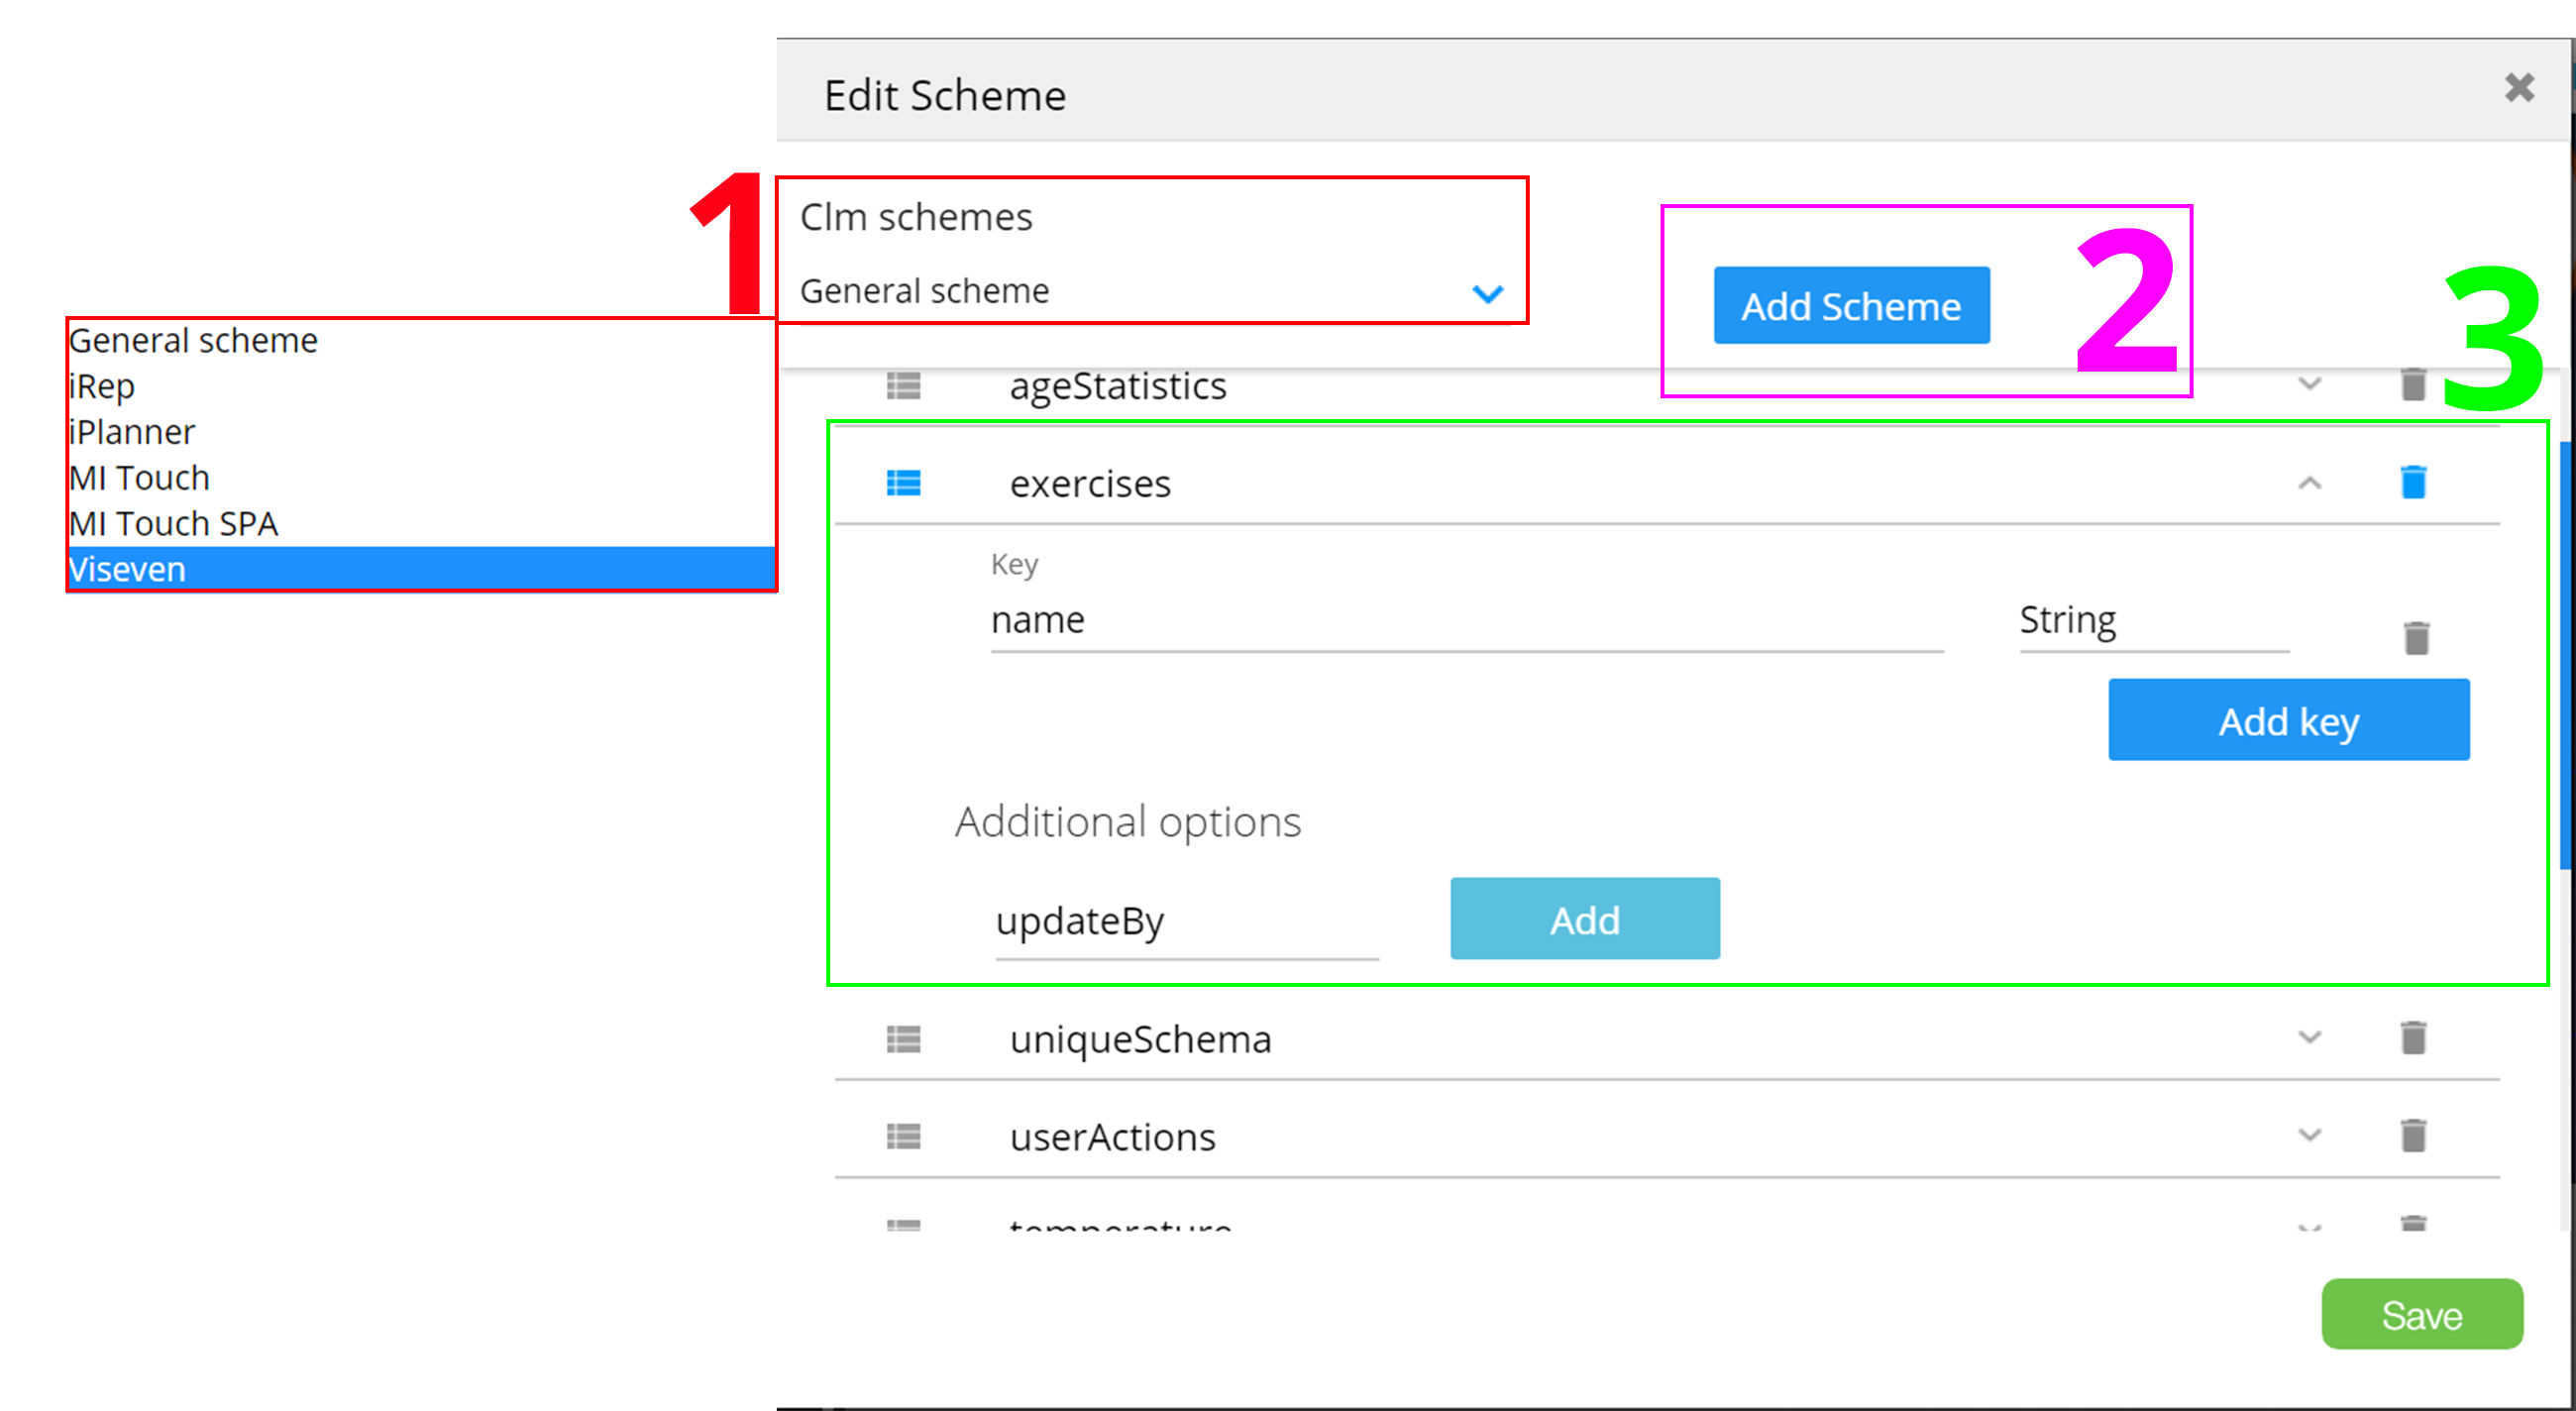
Select a
CLM scheme[1].Click
Add scheme[2].
A new scheme with a random name appears. Click its name to rename as you see fit.
- Set the
KPI scheme[3]: add or change keys and options.
- Click the key's type dropdown to select the required type (string, number or boolean). The key type selection depends on a parameter it is capable to pass
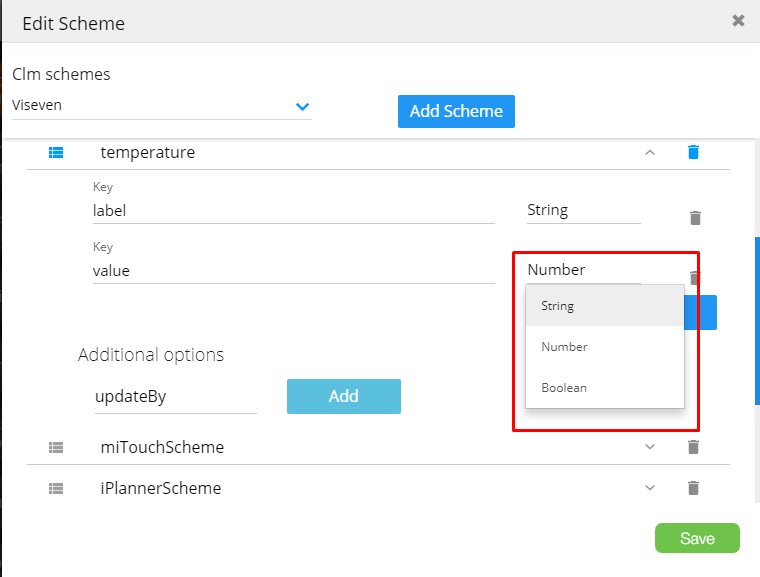
- You can
Adda newkey:
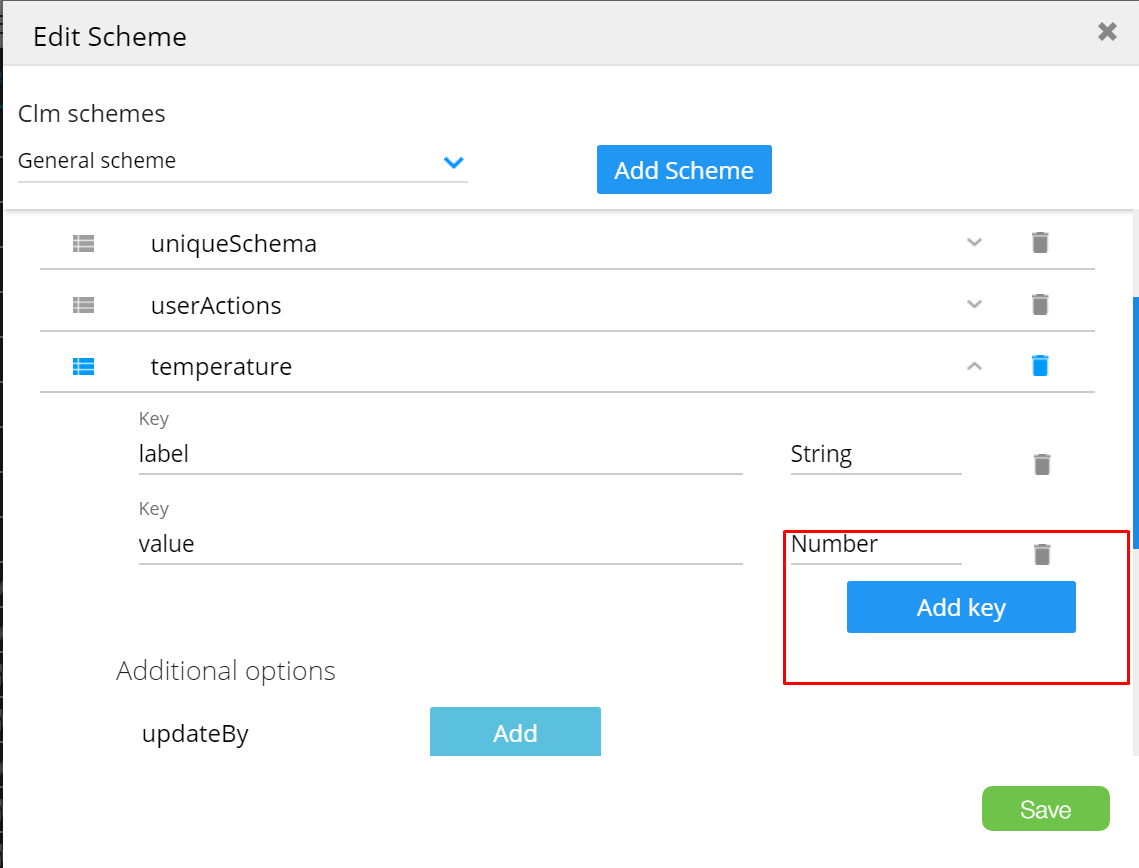
- Define the key's
type
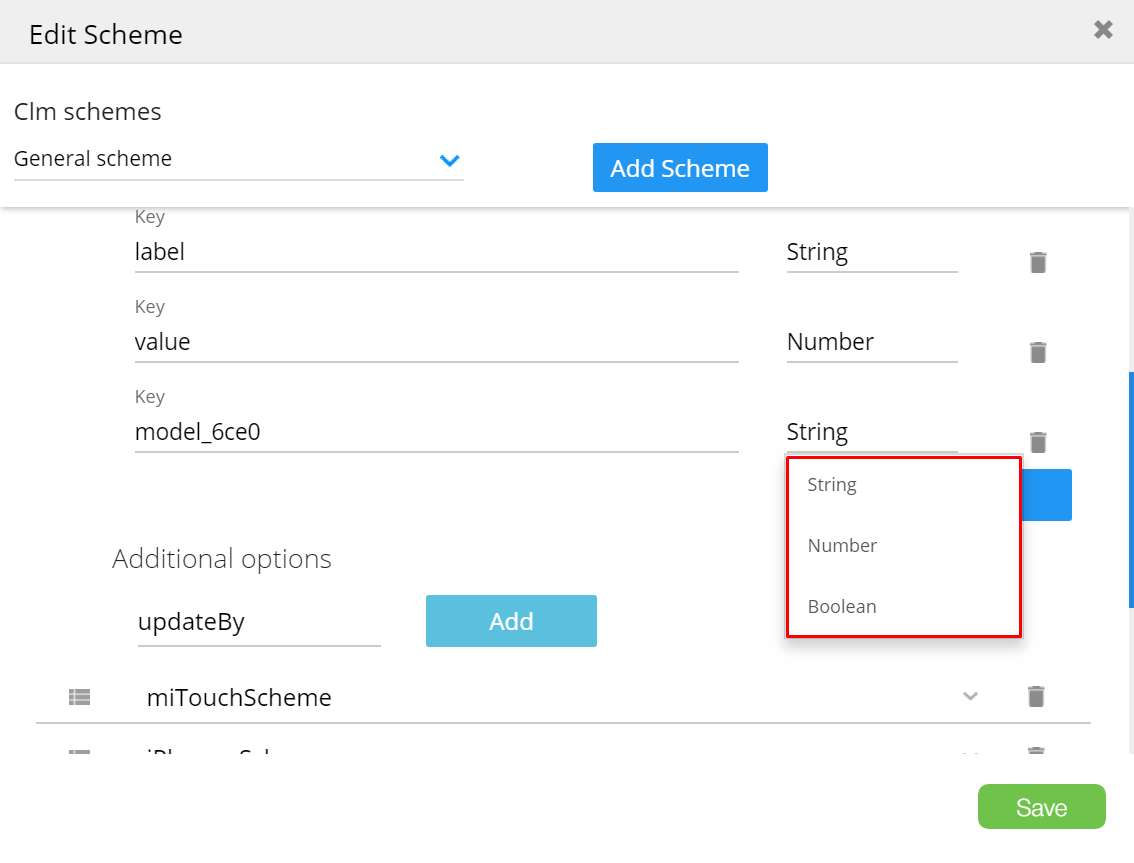
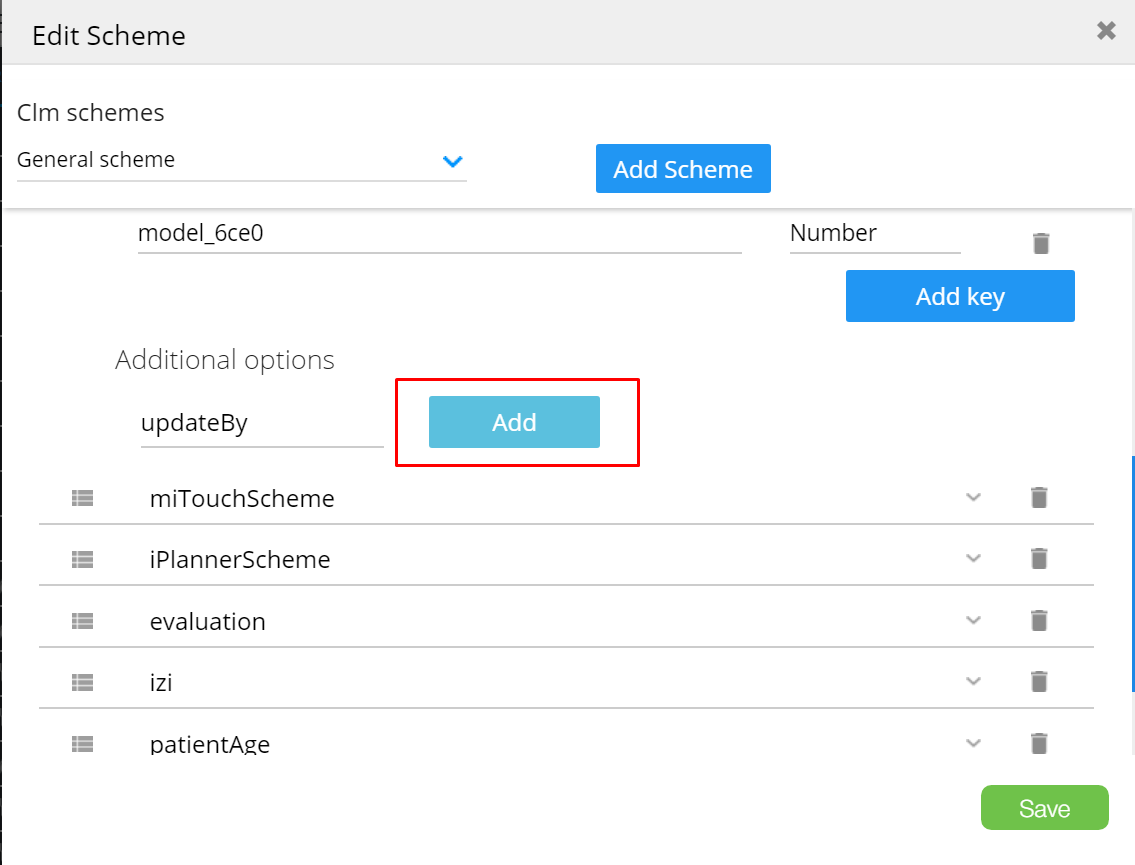
- To set any
Additional options, clickAdd. It defines how the information will be stored and updated:
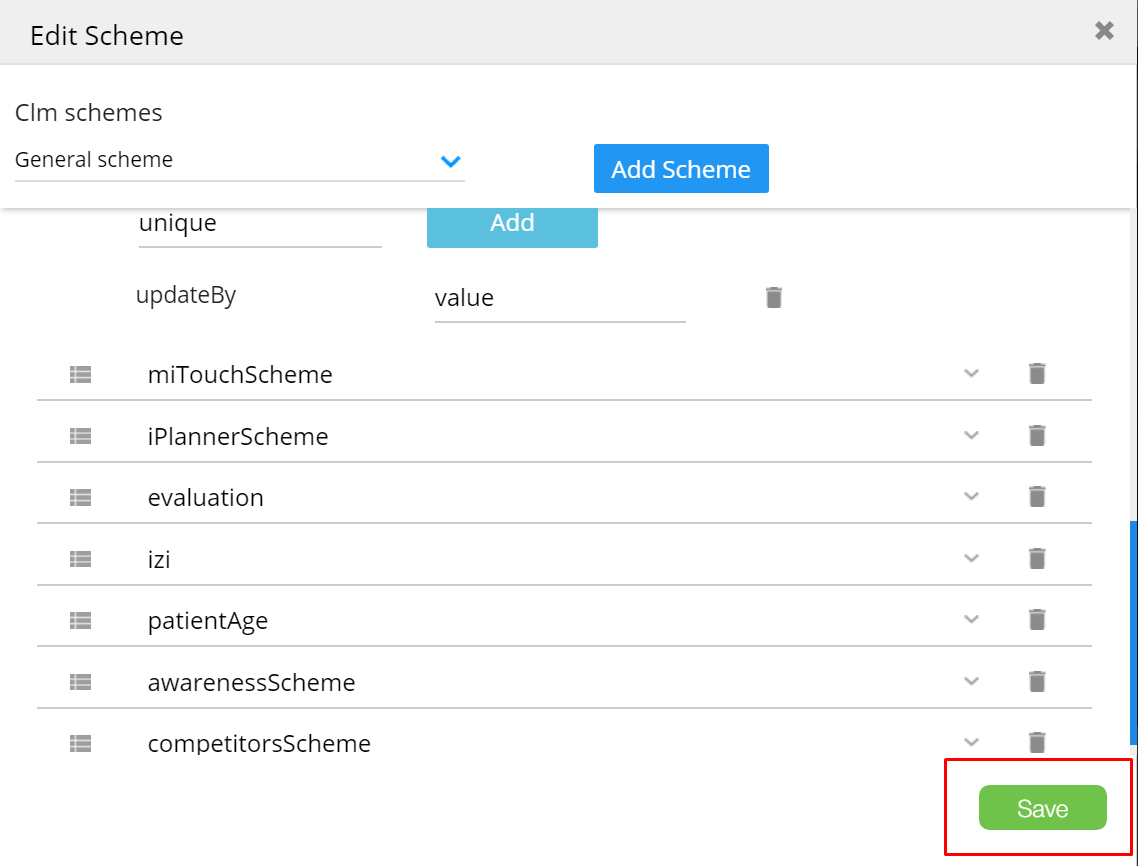
updateBy– every component's value change is recorded to KPI as a new keyunique– the component's value updates the same key in KPI
- Click
Save
Note the fields names:
Label is the KPI's name displayed in the report
Type is the KPI's type: text, number or boolean