Appearance
References popup
To specify the source of information stated in eWizard items, add references to the text components. You can access references in the References popup. On the layout, the selected text contains only superscript symbols as the references indication.
To apply references to your content item, create them in the configuration popup. Then, add created references to the required text component.
To create a reference:
Add the text component to the layout or select the existing one.
Go to the Properties tab and click
R.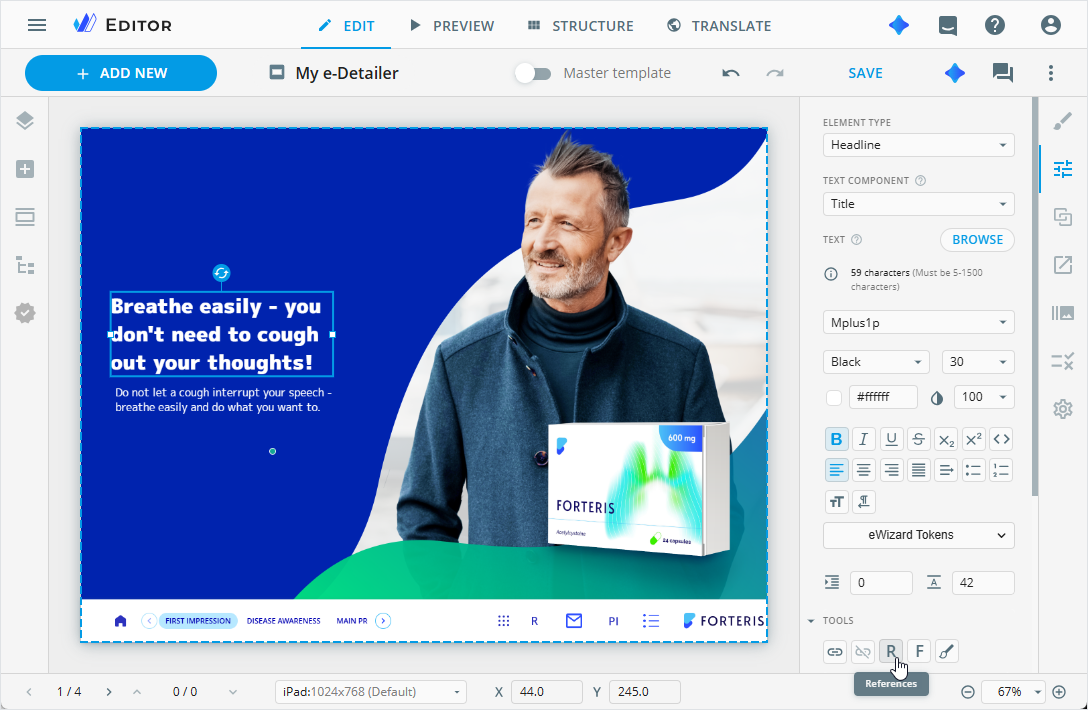
In the
Referencespopup, use the following buttons:+ ADD NEW: Enter the reference text manually and click .
.ADD FROM VAULT: Select a Veeva Vault reference in the Assets popup and clickADD.
The newly added reference appears at the end of the numbered list. To change the order of the references, drag them to the required position in the list.
References in eVa AI-generated emails
References in the popup include the
View in VVPMbutton when they're added automatically by eVa AI or manually with theADD FROM VAULTbutton from VVPM.The
 button redirects you to the source document overview page in Veeva Vault PromoMats, opening it in a new browser tab.
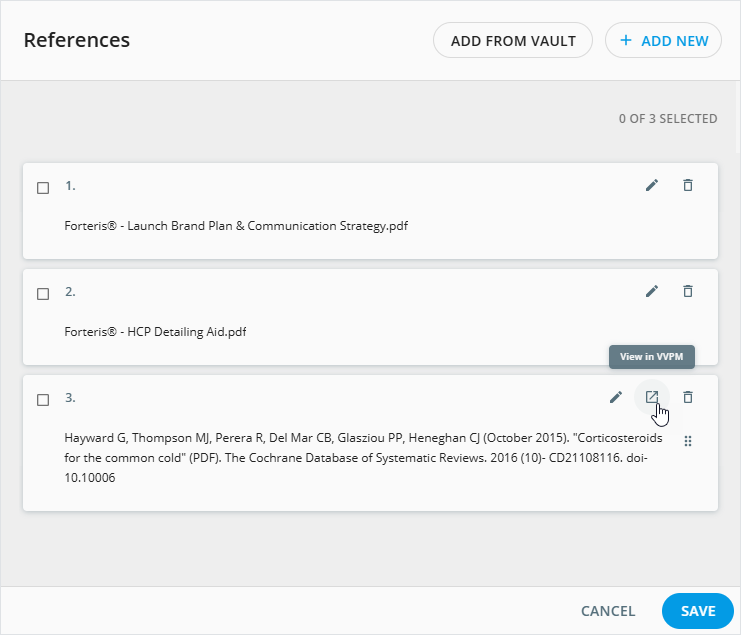
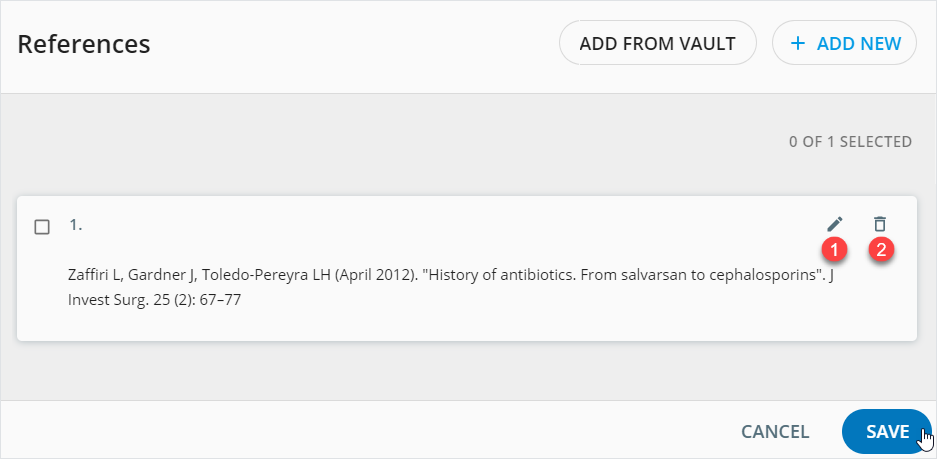
[1]: To edit the reference, click
 in its row.
[2]: To delete the reference, click
 in its row.
Click
SAVE.
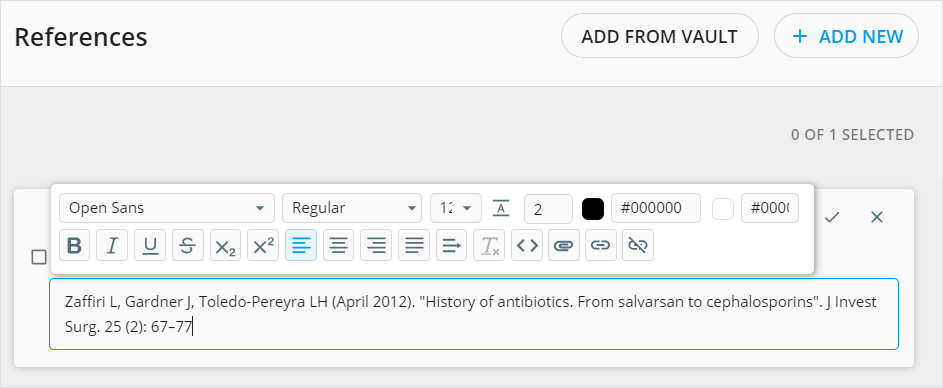
To format text when adding or editing a reference, you can do the following:
Change the font family, weight, size, and color.
Adjust the line height and text alignment.
Apply highlights and font styles.
Font styling
Reference numbers automatically inherit the font styles (bold, italic, underline, strikethrough) of the first character in your reference text. You can see this in the References component.

To prevent a reference number from inheriting these styles, add a regular, unformatted space at the very beginning of the text in the reference input field.

Contact your administrator to turn on the reference text formatting option if it's unavailable for you.
The following controls are available in the reference text WYSIWYG editor:
| Control | Action | Notes | Available for |
|---|---|---|---|
| Keep links as plain text and prevent target email clients from transforming them into hyperlinks. | Select the full URL link (including https://) in the text fragment and click Prevent transforming text to links in email clients. | Emails, their briefs, and fragments | |
| View and edit the HTML code of the reference | Make sure you use the correct HTML syntax in the modified code. Click the Code view button again to exit the HTML editor. | All content items | |
| Add a PDF to the reference | Select the text fragment and click Attach. In the Assets popup, choose the required document. You can add only one PDF per reference. Available for e-Detailers and their briefs. | e-Detailers and their briers | |
| Add a link to the reference text | Select the text fragment and click Link. In the Edit link popup, choose the Link type and fill in the required fields. | All content items | |
| Delete the link | Select the link text or put the cursor near it and click Unlink. | All content items |
References in text
To add references to your text:
Place the mouse cursor in the required place of your text.
Click
Ron the Properties tab.In the
Referencespopup, select checkboxes of the required references.Click
SAVEto apply changes.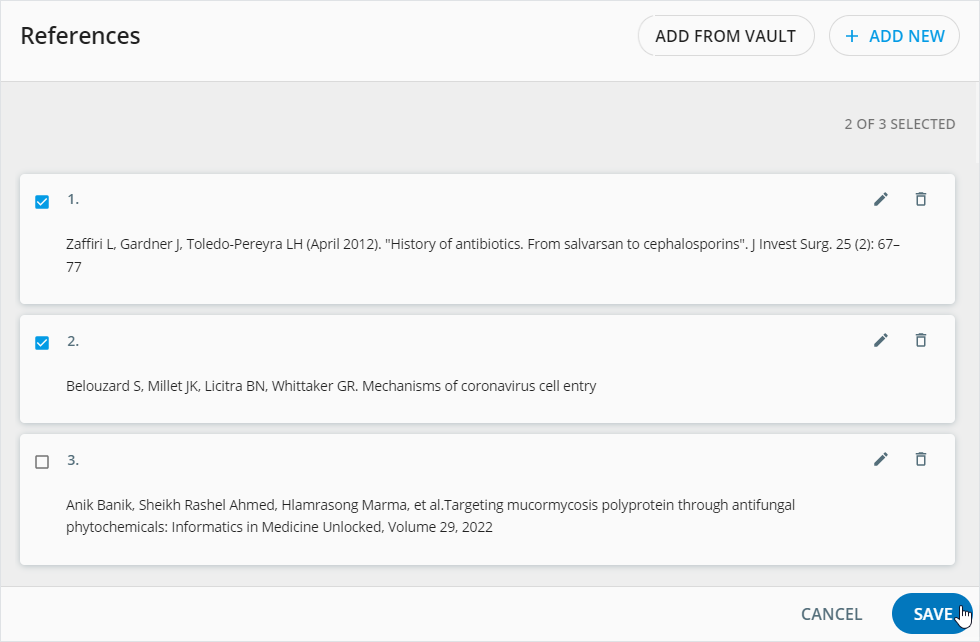
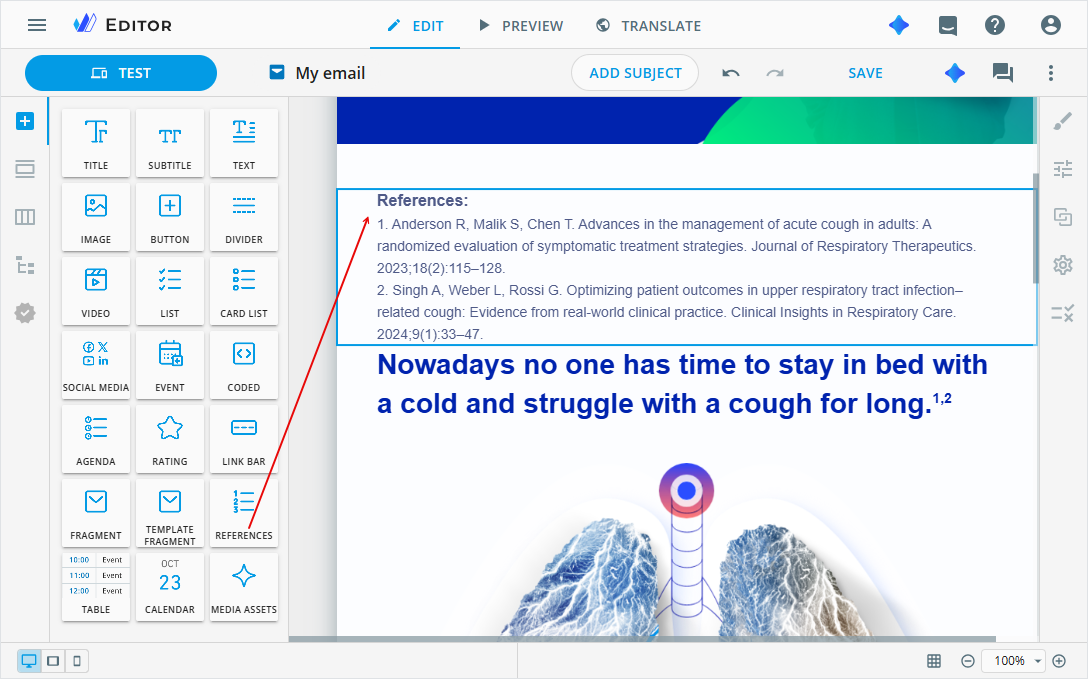
The superscript reference indicators appear in the text where you've placed the mouse cursor.

e-Detailers and their briefs
References on each slide are numbered sequentially, starting from 1. For example, when you select references 9 and 10 from the list and add them to the text on the new slide, they're displayed as 1 and 2 on the slide layout, since numbering restarts on each slide.
To check the references added to the text components, open the configuration popup.
In the
EDITmode, select the reference indicators on the layout and clickRon the Properties tab.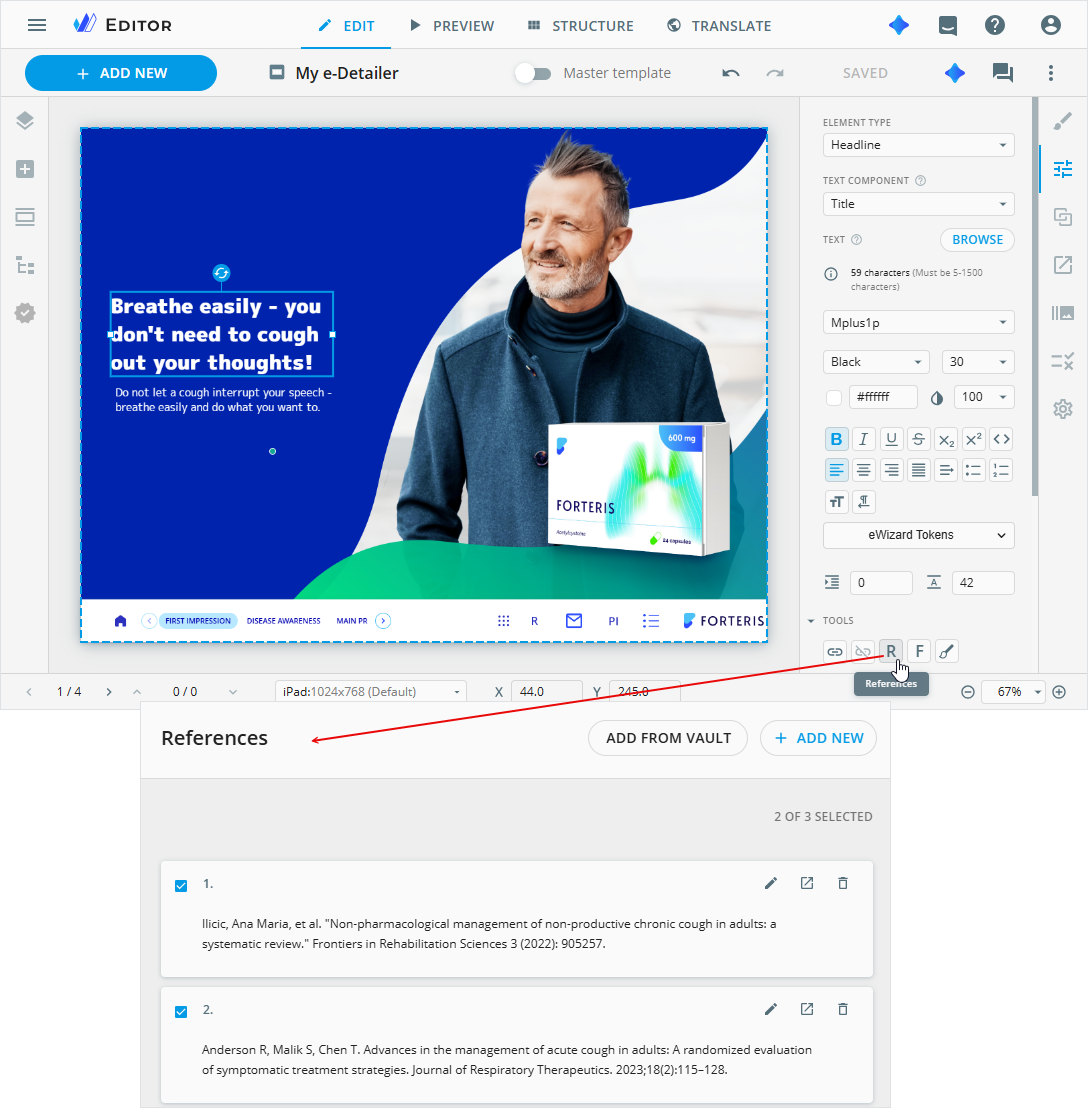
In the PREVIEW mode, click
Rat the bottom of the slide.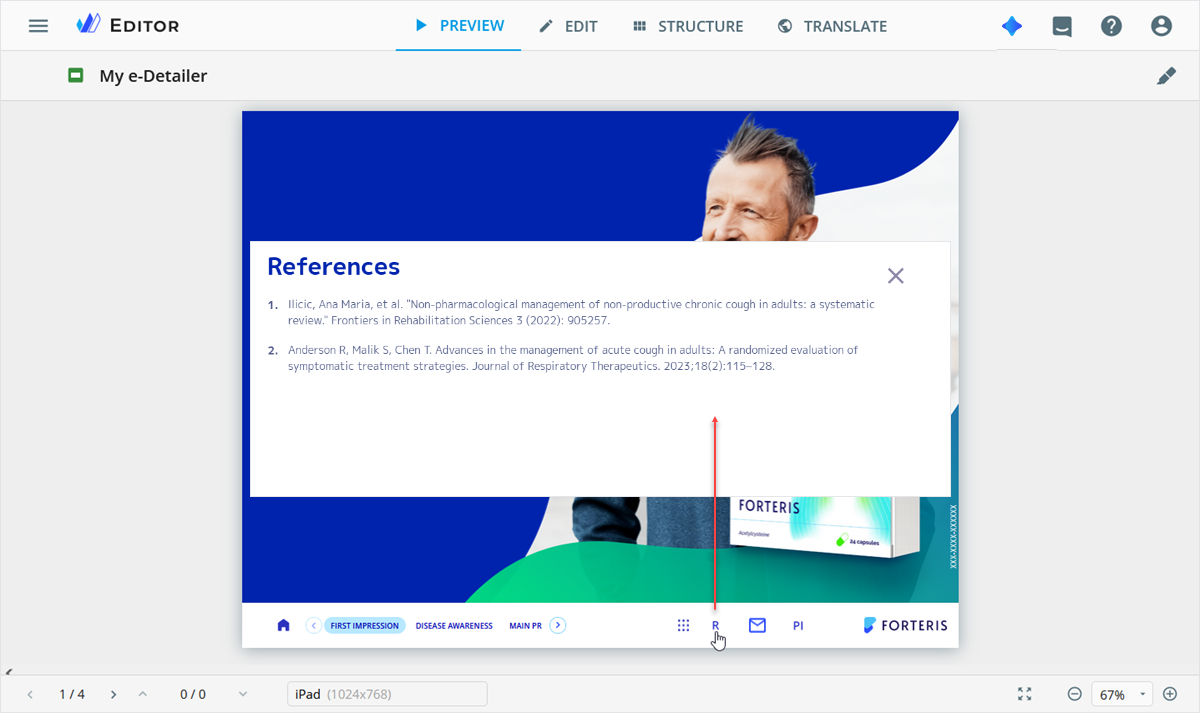
After publishing a content item with Veeva Vault references, the resulting VVPM PDF document contains annotation cards linked to the referenced text. These cards appear next to the content item layout and provide a direct URL to the reference document along with its name, making the text source immediately clear.
Contact the administrator to configure the display of annotation cards in VVPM PDF documents.
Reference numbering and order
The numbering and order of references inside the References popup are for display and management purposes only. Rearranging items within this list doesn't change their numbering or order on your final layout.
Reference ordering works as follows:
References are automatically numbered in your final content item based strictly on their order of appearance in the content text.
The first reference link your target audience encounters in the text will always be numbered 1, the second will be 2, and so on, regardless of their order inside the
Referencespopup.
If you want a different numerical order of references in your final content item, adjust the sequence in which the superscript reference indicators are placed within the text components themselves.
e-Detailers, emails, and their briefs
Reference numbering follows the order of text components with references on the Tree tab, rather than their position on the content item layout.
Components positioned higher on the
Treetab receive lower reference numbers.In e-Detailers, moving a component on the layout doesn't affect its reference numbering unless you also move this component on the
Treetab. In emails, moving a component on the layout automatically updates its position on theTreetab.
Indicator properties
In e-Detailers and their briefs, you can set up the resulting appearance and behavior for the reference indicators on the slide. For this:
Turn on the Master template toggle.
Open the Tree tab.
Click
References.Go to the Properties tab on the customization panel.
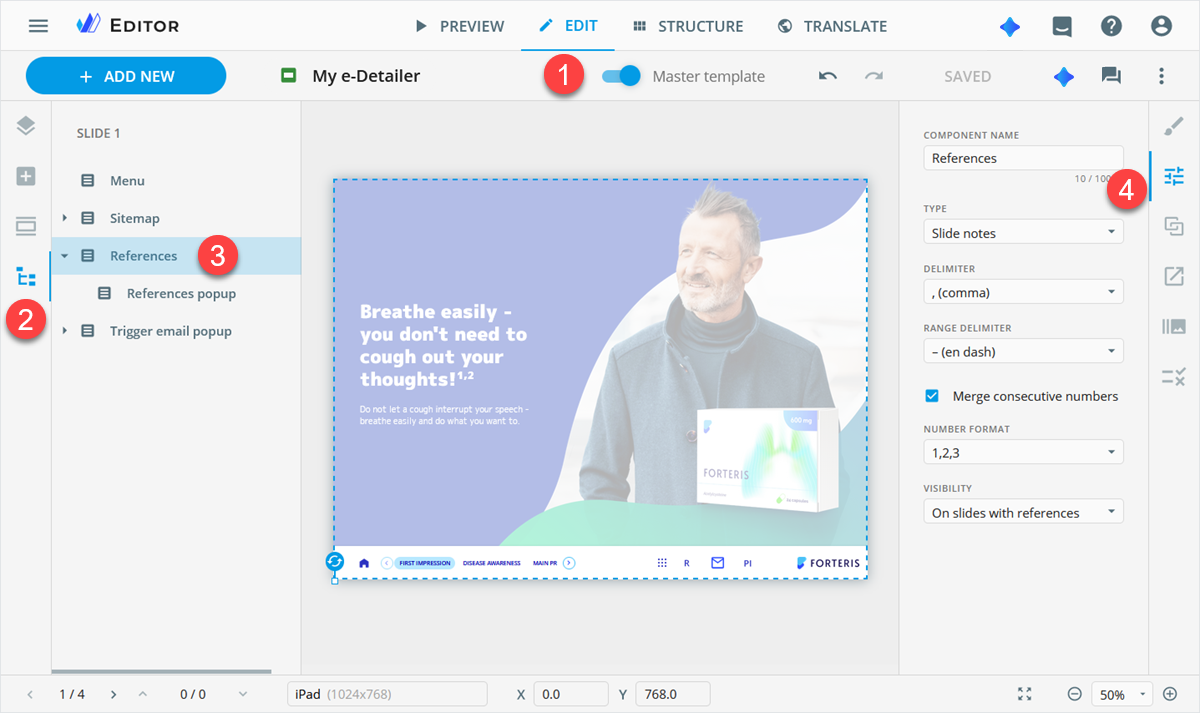
You can set the following properties:
COMPONENT NAME: Rename theReferencescomponent. Your changes appear on the Tree tab immediately.TYPE:Select the
Slide notestype to show the reference number relative to the references on a slide.Select the
e-Detailer notestype to show the reference number relative to the list of all references in the e-Detailer. Once you choose this option, theVISIBILITYfield becomes available.
DELIMITER: Set commas or brackets to separate the references indicators.RANGE DELIMITER: Choose the hyphen-, en dash–, or em dash—to separate the consecutive numbers.Merge consecutive numbers: Selected by default. This option displays the consecutive numbers with a range delimiter between the first and last consecutive values (for example, 1–3). Deselect the checkbox to display all consecutive numbers in order (for example, 1, 2, 3).NUMBER FORMAT: Set numbers, letters, or asterisks as references indicators on the slide.VISIBILITY: Available with thee-Detailer notestype selected. Choose whether to display theREFERENCESbutton only on slides with references or on all slides.
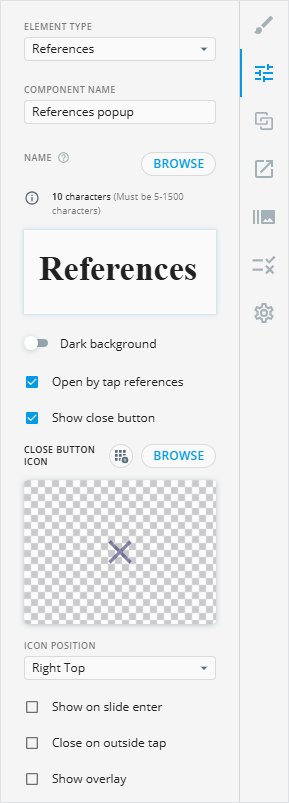
Popup properties
In e-Detailers and their briefs, you can customize styles and properties of the references popup. For this:
Turn on the Master template toggle.
Open the Tree tab.
Unfold
References.
Select the
Reference popupcomponent.Go to the Properties tab.
Here, you can do the following:
ELEMENT TYPE: Assign the element type to classify the component in Veeva Vault.COMPONENT NAME: Rename theReferences popupcomponent. Your changes appear on the Tree tab immediately.NAME: Change the popup header with the WYSIWYG editor or browse for the required text in the Assets popup. Click the popup header to change its font and color. To improve the visibility of the popup header in the text input area, switch on theDark backgroundtoggle.Open by tap references: Selected by default. You can view the popup by clicking the reference number in the text. Clear the checkbox to prevent the popup appearing on click.Show close button: Selected by default. Show/hide the close button.CLOSE BUTTON ICON: Save the close button icon to your Library with the button.
The file is stored in the size and format used in the content item type.
Its name is generated automatically. If the image metadata doesn't contain a human-readable name, the system generates one using the word "editor" and a unique ID.
Click the
BROWSEbutton to open the Assets popup and change the close button icon.ICON POSITION: Set the required position of the button close icon within the popup.Show on slide enter: Cleared by default. Select the checkbox for the popup to appear when you open the slide with a reference.Close on outside tap: Selected by default. This is the additional option to close theReferencespopup when presenting the e-Detailer. With it, you close theReferencespopup, tapping the slide anywhere outside the popup. Clear the checkbox to close theReferencespopup with the close button only.Show overlay: Selected by default. It grays out the slide area behind theReferencespopup. Clear the checkbox to keep the slide area behind the popup unchanged.
To customize the size, position, background color, and border of the popup, go to the Styling tab.